Most of us have probably heard the saying “all that glitters is not gold”. Unfortunately all too often I see something glittering ahead of me in my pathway as I ride my trike along. And most of the time what I am seeing is broken glass. Yes, it seems we live in a time when there seem to be a bunch of people who get their kicks out of purposely breaking glass … often right where they know those of us on bicycles (our human powered vehicles whatever they may be) will be coming along and have to deal with it. I clean up broken glass usually a few times a week. It really gets old. Certainly it is thoroughly disgusting. And it is extremely risky and fool hardy to ride over it. Obviously, sometimes we can’t help it. We may not see it in time to be able to avoid it. There may be some reason why we can’t maneuver around it.
I used to get a lot of flat tires and most of them were caused by glass shards. Also I have had tires destroyed by cuts which was really disgusting since I didn’t get the mileage they would have been capable of yielding otherwise. I am pleased to be able to report that all of this is past history for me personally. I still deal with broken glass, but I no longer deal with the concern and problems the broken glass causes. Since I started using Schwalbe Marathon Plus tires I have had no more flat tires nor have I had cuts in my tires. I always try to avoid riding over glass if it is possible, but if I do it is no big thing like it used to be.
Yes, when I see something glittering in the pathway ahead of me I am always hopeful it is gold … the real McCoy … but alas it is still just broken glass. (I would have even settled for silver.) Some times it is more like “fools gold” … as it looks like broken glass glistening, but when I take a closer look I see it is actually in the pavement and not laying on top of it. That glitter certainly catches my eye so I reckon it is good that this is a characteristic of broken glass. At least it helps us see it and hopefully avoid it. I’m sure most of us would much rather just …
Different strokes for different folks as they say. Me, I like the wind in my face (and elsewhere) while I am out riding as it feels so good to me. I would be most miserable without it. However, some don’t like it so they opt for fairings. I readily admit that riding in nasty weather a fairing might indeed feel good.
Some are made so that they can be temporary moved forward somewhat out of the way helping the rider to get in and out of their trike. If you have physical limitations these fairings would be a big problem. I could not use one as I get on and off of my trike walking forward and backward straddling the boom. I can not safely step over the boom as is required when using a fairing. Anyone with balance issues or unsteadiness would probably have problems.
HP Velotechnik (shown above) states that their fairings will also fit several other brands of trikes.
Graham Williams of England has a video about two of his trikes outfitted with fairings. He is obviously sold on fairings and truly enjoys them on his trikes.
Graham also has this video showing a little detail of how the fairing is mounted.
Here is another video showing the installation of a HP Velotechnik Streamer fairing. The audio in this video is all messed up.
As mentioned in the video the location of lights might very well be another problem. Also oncoming lights may as well. Mind you, I have never ridden a trike with a fairing so I have no experience with one. I am merely stating what comes to mind about potential concerns.
Another concern I would have in using a fairing is visibility. Brand new a fairing would be clear, but in time I would think they would get messed up and greatly reduce visibility. Even in rain and snow looking thru a fairing could be quite challenging and unsafe in my opinion. And depending upon where one rides the fairing could get in bad shape rather quickly. I guess I am glad I have no desire for one as I would be quite upset to spend all that money only to see it get ruined before my eyes (quite literally).
Lastly, I would be extremely concerned about damaging a fairing as they would be very easy to damage since they stick out like the proverbial sore thumb. And again, that would really upset me spending all that money on one.
Utah Trikes has several fairings shown on their webpage along with the prices of each.
LOOK OUT, IT’S A SNAKE! Some refer to these as Gaadi snake inner tubes.Iam sure some would say … “It’s about time!” … that somebody came out with this product. It surely simplifies changing an inner tube. With this it is not necessary to remove the wheel. As long as you have access to the side of the tire you can accomplish the task with the wheel still mounted on the trike.
They aren’t cheap … $15.75 plus shipping on Amazon (free shipping if your order is a minimum of $49). Also they are only available for larger diameter wheels (26/1.5-2, 26/2=2.25, 29 x 1.75-2.1, 700/28-35, and 700/37-42) … at least at this point in time. Perhaps they will eventually be available in other sizes. These double ended tubes would sure be nice to have available in 20 inch for those of us who currently have to remove the front wheels.
They are available in both Presta and Schrader valve types.
Here is a video showing how to install this inner tube. You can clearly and readily see how practical this is compared to a conventional inner tube.
HERE is an article about them. Some tadpole trikes are easy enough to change the inner tubes on the front wheels without removing them as they have nothing in the way. Just tip the trike over on its side and have at it. However, some trikes have things such as fender braces in the way preventing this. Even so, the picture below shows the tube be inserted on a wheel that has fender braces. So maybe it would be possible to accomplish.
I think you can see that this could revolutionize fixing a flat … especially alongside the road/trail or if you have a trike that is very difficult and involved to remove the rear wheel. It most definitely will help us to …
KEEP ON TRIKIN’
By the way, a temporary emergency fix for a flat tire is to take the conventional inner tube out and cut it in two where it is leaking. Then tie a knot in both ends so it can be re-inflated. Try not to shorten the tube any more than necessary as it won’t be long enough to go all the way around inside the tire and this would be problematic. Of course, this emergency repair is only if you have no other means of making the repair.
Most of us were/are not able to go there personally. Fortunately there are some folks who did go and they went for one purpose … to provide a report consisting of interviews on video. And now they’re back … and the Laidback Bike Report from Spezi 2016 in Germersheim, Germany is completed and uploaded to YouTube.
Gary Solomon writes … “Known in Germany as the Spezialradmesse this is the world’s largest trade show of recumbents of all sorts. There were about 20 exhibitors who showed 2 wheeler recumbents and about 40 exhibitors with trikes most of them recumbent. ” I am not trying to steal their thunder. I only want to be a channel … a means … for others to discover their great video and view it. They truly did a great job … very professional.The interviews are very interesting and very informative. You can find out “what’s new” from various manufacturers.
Here is their team that went there and produced their awesome interviews.
Gary Solomon, Lars Komm and Larry Varney
Here is the contents found on their video. With this if there is anything in particular you are interested in you can skip ahead to it. If there is something you aren’t interested in you can skip it altogether.
The well known and respected German tire manufacturer, Schwalbe, has put together a considerable amount of information about tires on their website. Being the number one tire manufacturer in all of Europe and gaining rapid ground in the U.S. I think it is safe to say that they know a thing or two about tires. Here are their various webpages concerning tires:
I came across a website where one can obtain some “parts” for some tadpole trikes. The man even has some parts for the defunct ActionBent and TWBents trikes. He has pictures of the parts on Picasa. I have not figured out any way to contact him however. I find that a bit strange. It seems to me if you are trying to advertise and sell stuff you would provide a means interested buyers can contact you. Anyway, he is located in Shoreline, Washington. Click HERE to visit his Picasa page. Among the items he has for sale are some wheels, tires and inner tubes. Here is a screenshot of just some of the items he has for sale:
The size of the images displayed on Picasa are adjustable. These images are the smallest size just so I could fit as many of them on the screen as possible. If you place your cursor on the image on his Picasa page some of them will pop up more information including prices. If anyone figures out anyway to contact him please let me know so I can add that information here.
I can find his street address, but I won’t post it here without his knowledge and permission. If you want to know it you can look it up online HERE. I have found his Google Plus page and his YouTube page. I assume one could make contact with him by leaving a comment to him on one of his YouTube videos. I am not into social networking skills and knowledge as much as some so there may be ways of making contact with him I don’t know of. Again, I am not going to post any of this here without his knowledge and permission.
Some believe helmets should be mandatory for anyone riding a bicycle. I am not here to discuss or argue this matter one way or the other. I will just say this … I do believe in freedom. I personally choose to wear a bike helmet while riding a two wheel vehicle being it a bicycle or motorcycle. On my tadpole trike I rarely wear a helmet and feel quite safe without wearing one. I also believe that anyone who chooses not to wear a helmet should not be eligible to receive any monetary (medical) help from taxpayers.
Legislators often make laws making it mandatory for children to wear helmets and in some places they have also included adults.
Certainly there are statistics supporting the use of helmets … “In the United States, 300 children are killed each year in bicycle-related accidents.
About 400,000 children are injured in bike-related accidents each year that require emergency room treatment.
Eighty percent of fatal bike injuries or 75 percent of disabling injuries could be prevented with a helmet.
Studies have shown that helmets reduce the risk of bike-related injuries by 85 percent.”
This information is from the Johns Hopkins Injury Prevention Center …
“Each year in the United States, more than 900 cyclists are killed.
Bicyclists hospitalized with head injuries are 20 times as likely to die as those without.
Bicycle death rates per 100,000 are highest at age 10 -14.
Bicycle injury rates per million trips are highest at age 5-15.
Fifty-six percent of fatally injured cyclists are 20 or older.
Bicycle death rates per million trips are highest above 50.
Head injuries in cyclists are noted in 65,000 emergency room cases and 7,700 hospital admissions annually.”
The rider who was wearing this helmet lived to ride another day. Photo courtesy of Tom Remington/Bicycle Helmet Safety Institute.
HERE are the States which have mandatory helmet laws … New Mexico was the first to include tricycle riders.
The green states are states with state-wide bike helmet laws.
The red states are states with some local helmet laws.
The black states have no known state helmet laws.
And HERE are the U.S. Military Regs on Bicycle Helmets.
These are British soldiers. I could not find any pictures of U.S. military personnel riding bicycles and wearing helmets.
Some of us travel around and ride in various locations. We need to know what the laws are concerning the use of helmets, especially if we are among those who normally don’t wear a helmet on our trikes. Hopefully this information resource will be helpful to you. Be safe, enjoy the ride and …
I have no other means of communicating this so I am using this posting in an attempt to communicate with readers of this blog who are from the Philippines. Each day I see the report of visits to this tadpole rider blog and from what country they are from. Frequently I see that there are people from the Philippines. I am particularly interested in knowing more about anyone from the Philippines that visits my blog. You see I am married to a Filipina so the Philippines has a special place in my heart. I would love to hear from you and find out where you are from and how you are involved with tadpole trikes.I am also interested in what is going on in the Philippines as far as tadpole trikes … like how popular they are (how many you see) and if factory manufactured trikes are around or if they are all homemade. Please email me at: tadpolerider2 at gmail dot com (@gmail.com). Don’t be shy!
Some of us use twist grip shifters and some of us who use them complain about difficulty twisting them using the little finger and palm of our hands. Certainly on a diamond frame upright bicycle (which is what they were designed for) they are installed so that our thumb and opposing finger are positioned on the twist shifters making them much easier to twist. Trike manufacturers who installed these on their trikes have inverted them so that they are facing down instead of up. I have often wondered why they did this. Surely they know it is not how they were designed to be used and inverting like they did creates problems twisting them. But, hey, there is nothing that says we have to have them that way. We are free to invert them. The same is true of the brake levers if we want them inverted. It is likely that we will need longer cables if we invert these.
Some homemade trikes have the twist shifters and brake levers inverted. When I made my first trike I positioned my twist shifters and brake levers inverted from the “industry norm”. Here is a picture of it during construction.
I have to admit that I liked it this way and I have been seriously considering changing my setup around on my Catrike Trail trike.
An available option is the use of “brake cable noodles” to help make the sharp bends without binding or damage to cables trying to curve them more sharply than one might normally have them. Although they are made for brake cables I have read that they can be used on shifter cables as well. Although the image below is not of an inverted shifter it still serves to illustrate the use of a noodle on the brake lever. Notice how tight and neat the curve is keeping the cable from being stuck out into outer space so to speak.
BTW, the brake lever does not need to be inverted unless one desires to have it inverted. It will function fine the other way around when the twist shifter is inverted. Indeed, if your handlebars are positioned fairly close to the wheels/tires you may not want your brake levers inverted from the industry norm.
Yep, I just might invert my twist grip shifters. How about you? They are easier to use that way. I don’t know about you, but I am very much in favor of ‘easier’, especially as I age and get a bit weaker. 🙂 I am all for most anything which will help me …
I am sure most of us have heard that saying before. I am a firm believer in it along with some other well known sayings such as “Design should follow function rather than trend” … “A place for everything and everything in it’s place” … “A clean shop is an efficient shop”, and on and on the list could go. When it comes to our trikes I definitely don’t believe it is wise to mess with stuff when everything is working okay. It doesn’t take much to totally mess up some things such as derailleur adjustment. One thing for sure … if we are going to mess with something it is best that we know what we are doing. Otherwise we will likely mess it up … and probably not be able to fix it.
Even professional mechanics sometimes mess stuff up and aren’t even aware of it. I once took my trike in to a local bike shop (LBS) to have the rear shifting cable changed. I usually do this myself, but I decided to hire it done that time as I just didn’t feel like messing with it. Upon getting my trike back from them and back home I took off for a ride on it the next morning. I rode it about an eighth of a mile and while pedaling along I noticed something which didn’t seem right. I had some noise and some resistance as I pedaled. It felt like the chain was rubbing on something. I stopped and got off to take a look to see if I could discover the problem. At first glance I did not spot the problem so I decided to take a closer look. I tipped the trike over on it’s side and it didn’t take long to see what was going on. The chain had been “broken” (taken apart) and when it was put back on the return portion of it was routed on the top side of the idler pulley instead of on the bottom side so the idler pulley wasn’t doing anything … wasn’t even being used. DUH!!! I could not believe a professional mechanic could possibly do something so dumb. The chain had been rubbing on the bottom side of my frame and cut into it a ways. I rerouted the chain placing it where it belonged so I could ride on. When I got back home later I emailed the LBS about this letting them know what they did and the damage it had done to my frame. I was not a happy camper. They denied that they even had the chain apart and messed with it, but when I pointed out that there is no way for the chain to change to that position without someone taking either the chain apart or the idler pulley assembly they said that I should bring my trike back and they would do whatever is needed to satisfy me. (They never did admit to being at fault however. They continued to deny that they had done this.) They filed/ground the frame where the chain had rubbed and cut in to smooth everything back out and repainted the area. It looked very good when I got it back. I could barely tell anything had happened. I could have pushed for a new frame and to tell you the truth, in hindsight, I wish I would have since this little incident did weaken the frame somewhat. I would have been within my rights to do so, but I was trying to work with them and let them off easy. Now, I told this story to you because it ties into what I am addressing … if it ain’t broke don’t fix it. There was no reason for them to have taken my chain apart which caused this to happen. I had my trike in there for replacing the rear shifting cable … nothing else. Yeppur, I am a firm believer in …
I am pretty sure most of us wouldn’t have a clue what we are looking at when viewing the image above. Maybe this will help …
These are “springs” made of aerospace titanium grade 5 metal and are Azub’s choice for a unique front suspension which they claim is superb … superior to anything else out there. Azub is known for quality in their products so I am sure they have a winner here. You can read about their design HERE.
This new model has been in the works for 3.5 years (I have also read 5 years so I don’t know which is correct) and will be available at the end of July of this year (2016) for those are signed up on Azub’s waiting list. It will be available in either a 20 inch or a 26 inch rear wheel. The cost of the trike is said to be “starting at $4992 or €4160”. You can check out Azub’s website for more on this model or any other model they offer.
Azub had it on display at the recent SPEZI event in Germany.
There is lots of articles about this model available online. HERE is one of them.
Azub boasts of “self stabilization” … something not achieved by most other trike makers. The leaf springs used on the front suspension offer 1.5748 inches (40 mm) of travel.
I am not sure of this because I haven’t found any information about the rear suspension of the Ti-Fly model, but I think it is the same as found on their Tri-Con model. Here is a picture of the rear suspension of the Ti_Fly …
This model does fold and, in fact, is capable of folding up extra small by removing the front boom and wheels. The trike has indirect steering. It has 4.33071 inches (110 mm) of ground clearance. The back of the seat adjusts between 34 – 52 degrees angle which is pretty generous. The overall width of the trike is 32.874 inches (835 mm). The track width is 29.7244 inches (755 mm). The wheel base (front to back axles) is 46.06299 inches (1170 mm). The seat height is 10.2362 inches (260 mm) at it’s lowest setting or 11.4173 inches (290 mm) at it’s highest setting. The maximum weight limit of rider and luggage is 275.578 pounds (125 kilograms).
It will interesting to see how these sell and if ever I actually see any of them out on the local trails. I haven’t seen my first Azub yet so I won’t be holding my breath awaiting it. That’s a whole lotta’ money to invest in a trike, but some folks do it. Most people I talk to think a thousand dollars is outrageous and quickly lose interest in pursuing getting a trike when they find out how much they cost. With or without full suspension or even rear suspension let’s all just try to …
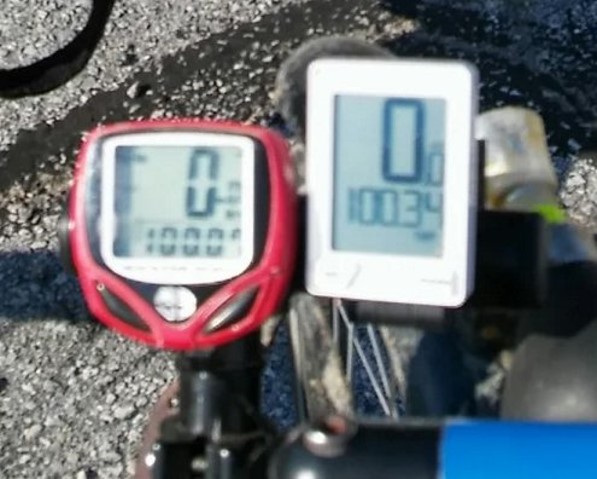
Do you use a bicycle computer? If so, is it accurate (or akwert as one of my high school teachers used to pronounce the word)? Getting a computer set accurately can be a bit challenging unless you know what you are doing. Some people settle for their computers to be inaccurate often times not realizing how far off they are and how many extra miles they are showing than they didn’t really ride or miles they are failing to show that were ridden.
There are different ways to go about setting a bike computer so it will be accurate. I will confess that until recently I personally had only used one of them which I am happy to report that my computer was about as close as is humanly possible in getting it set accurately. However, recently I ran into a problem which took me down a different road figuratively speaking. I will cut to the chase and tell you my suggestion for a sure means of getting the right number needed to set your bike computer. I will share all the other ways to go about it but I truly believe the best way is the “rollout” method with the rider sitting on the bike/trike so that the rider’s weight is computed into the final number.
Further below is what I originally posted in this lengthy article but here is what to do using the rollout method. First let me explain that the number which is sought after is the outside circumference of the tire being used for the computer. This measurement is in millimeters (mm) and must be obtained with whatever weight the tire will be loaded with including the rider’s weight. To get the most accurate measurement it is best to use a minimum of 3 rotations of the tire. I recommend using 5 rotations. Either place a mark on the tire’s sidewall or use the valve stem as the starting point to measure from. Start with the mark or valve stem down in the 6 o’clock position and end with it down in the 6 o’clock position. Carefully place a mark on the pavement at the starting point. With the rider sitting on the bike/trike carefully roll forward in a straight line counting each rotation until the number of rotations has occurred. Carefully place another mark accurately where the mark on the tire or valve stem is at (at the 6 o’clock position). Now measure the distance between the two marks. You will need a long enough tape measure to do this. I measured in inches and converted it to mm. For instance, my recent measurement between the two marks was 315 inches over 5 revolutions. So divide the number by the number of revolutions … 315 divided by 5 is 63. So it is 63 inches around the tire I was measuring. To convert the inch figure obtained to millimeters multiply it by 25.4. 63 x 25.4 is 1600.2. So the number I needed for my computer setting was 1600. If it would have been 1600.6 to 1601.4 than I would have used 1601. Actually if the number comes out with .5 it can go either way … down or up … 1600 or 1601 in my case. I checked this figure against accurate mileage markers and found it to be extremely accurate. Now if you just want to educate yourself on other ways to go about coming up with the number you can read on. As for me I don’t think there is any reason to. This method wins the prize in my opinion.
Here is all of what I originally wrote in this article:
So let’s get into this. Each bicycle computer should come with instructions which have a ‘chart’ showing the numbers used for various wheel sizes. That often will only get you in the ball park however, and “fine tuning” is required from there. Our local trail system has accurate mile markers (actually every 1/4 of a mile) so I use those to set my bike computer. The tires used will effect things as well. A lower profile (outside diameter) tire will be different than a higher profile tire. Tire inflation will also make a difference so it is best to have the tires inflated to whatever pressure you normally use when making any computer setting adjustment. Even rider weight effects the setting. Depending upon how far off the current setting is the amount of change in the number setting may only be “1” or if it is off quite a bit it may be considerably more. If your mileage shown is under you need to increase the number used in the setting. If your mileage shown is over you need to decrease the number used in the setting.
It is best to check your accuracy over a longer distance … like 5 miles rather than only 1 mile. And once you find that magical number write it down for safe keeping. And if you switch to other tires and the number is different write that tire and number down. It sure makes it a lot easier when you switch between tires.
**********
Here are some instructions on how to set your computer using the measured mile method:
1.0 (the measured mile)
Cyclometer Reading x Old Setting = New Setting
For example: If you set your 26×2.1 wheel size to: 2091 and rode the measured mile and came up short, maybe your computer read .95 miles, then you’d do:
1.0 (the measured mile)
0.95 (what your computer read) x 2091 (old setting) = 2201 (new setting)
If your computer read too long (far), maybe 1.05, you’d still do the same formula and your setting would be:
1.0 (the measured mile)
1.05 (what your computer read) x 2091 (old setting) = 1991 (new setting)
To help you out, enter your numbers here:
Your Initial Wheel Size Setting:
2091
Actual Distance Ridden:
1.0
Reading on Bike Computer:
1.05
Okay, change your bike computer setting to this:
1991
**********
HERE is a very handy calculator to determine the number you need to enter if you have the computer reading for a measured mile. The calculator is located at the very bottom of this webpage.
As I stated early on there are various methods of determining the number needed to set up a bike computer wheel size so it records accurately.
HERE is Sheldon Brown’s charts on this subject of computer setting for wheel size. And here is a video showing how this is done.
HERE is an online calculator for determining the wheel size setting.
Here is a video showing how to use a tape measure to determine the outside circumference of a bike tire and use that number to set the computer wheel size. This is sometimes referred to as the Roll Out method.
Lastly HERE is the Google search results for this subject. There is lots of helpful information online about this.
And hopefully the following will make things very easy, quick and handy for those of you who use any of these 20 inch tires. These are the magical numbers I have recorded for myself when I have ran various Schwalbe tires.
Big Ben Plus (2.15 width) 1600
Kojak 1496
Marathon (1.5 width) 1425
Marathon Plus (1.75 width) 1561
Tryker 1537
I have ran a couple of others, but don’t have the number recorded for them. I can’t guarantee that these numbers will work for you but I think they would be close. Like I said, there are various factors which determine what number is needed for each of us … our weight, tire pressure and weight hauling/loading on the trike … may mean your number will be different from mine. It is really not Mission Impossible so hopefully you can get your computer set accurately and from then on just …
Before leaving this subject of bike computers I want to touch on the magnets that attach to the spokes. My bike computer came with the type on the left in the image below …
which works, of course, but a friend of mine was throwing out one of his as he replaces his bike computer from time to time (the more expensive ones like he buys don’t seem to last). Anyway, I took it to use in place of my magnet and have found it to be better as it doesn’t get bumped around nearly as easily and seems to be less sensitive as far as it’s position. I rarely have had any issues with it, but I did with the original one that came with my computer.
As the saying goes … “there’s a new kid on the block”. In this particular case I am referring to work stands for trikes. TrikeTight is producing these two work stands shown above. As you can see one is a full size stand and the other is a bench (table) top model. Both offer folding so they are easy to store and transport.
To use their own words …
“After 20 years in the bike industry manufacturing bicycle carrying solutions, the designers of this new trike/bike stand sensed there was a need for a better work stand. In the past several years lightweight, fast, and fun 3 wheeled “trikes” have become increasingly popular. Along with that growth grew the need for a better way to service those trikes. TrikeTight.com and their trike/bike work stands was created to service the need.
TrikeTight has two stands. A table top that that can go on your work bench, tailgate, or any horizontal surface. And their full size shop grade roll around work stand with lockable wheels.
Both work stand designs accept the Traps bicycle carrier to let you also work on your two wheel bike. No need to raise your seat post, just simply take off the front wheel and mount it to the Traps carrier.
Work on your trike with the work stand wheels in the full locked or unlocked position, roll it out of the way for storage, or wheel it over to your vehicle for your next ride! Use the work stand like a “lazy Susan” to easily work on any part of your trike without having to walk around away from your tools.
Both stands also fold flat so you can hang either on your wall, lean it against a wall out of the way or easily take it with you in your vehicle.”
Various options are available:
Assembly Required … again using their own words …
“The Trike Tight Work Stand was designed to be assembled from many discrete pieces, saving you money on shipping and us flexibility in configurations. Assembly time is normally minimal and the needed tools are included, a custom box wrench and the appropriate Allen wrench, (the box wrench also include a bottle opener). Their stands come with an assembly instruction sheet. Hopefully, you will find the pictures clear and the written instructions easy to understand . (Should take the average person less then an hour to assemble.)”
At the time I wrote this article the company was not quite ready to sell their product on their website. I didn’t find any prices so I emailed them to inquire into it. Here is their response:
“Price for the RollAround stand is initially going to be $400. That include the pivoting/locking wheels, adjustable Plastisol dip coated cradles, All fasteners are Stainless steel, All tubing is 6061 Aluminum Powder coated, tubing inserts (Upper for the cradles and lower for the wheels) are CNC billet machined. Stands will be shipped partially assembled….ie. some assembly required. Side plates are CNC machined 6061 Aluminum on this initial run. Future production will most likely transition to Laser cut Stainless, not for strength but for ease of production. (easier to laser cut stainless to close tolerance then aluminum). We have table top stands ready to go also…..just have not set the price yet. Probably about $199….prospective buyers could contact me directly tom@triketight.com or send an inquiry via the website.”
It is good to have the proper tools and equipment to perform needed maintenance and repair work on our trikes. Having a work stand can be extremely helpful and practical. It can make doing the work so much easier. For sure it can help us to …
There you are riding along down a bike trail or road when you come around a curve or over a hill and suddenly find yourself face to face with one or more of God’s “critters”.
It can truthfully be said that any one of these critters provide plenty of reason to be concerned as we are no match for them should they suddenly turn on us. There is coming a day when all of the animal kingdom will be at peace with one another and we can interact with them just like we do our domesticated animals such as dogs and cats. I know that for a fact because God has said so in His Word. However, until then much caution is needed when around wild animals.
So I ask you … WWYD? What should you do? I am not an authority on this subject so I won’t give advice other than to say be careful what you do and definitely don’t approach or challenge them. The purpose of my writing this article is simply to talk about something that can and does happen … encounters with wild animals which are a danger to us.
Fortunately for me where I live about the most serious concern I have to deal with is loose dogs (and on very rare occasions large snapping turtles). For that matter even dogs on leashes, but not “under the owner’s control” are a problem. I have been charged by many dogs who were on leashes and they almost got me. Fortunately the owner managed to get control of them before they did get to me. I don’t have much use for dogs that behave like that. I don’t have much use for dog owners who have dogs that behave like that.
It is definitely not a pretty picture and nothing you would want to experience. I get so aggravated with dog owners who refuse to obey the leash law and allow their dogs to run free while out on the trails. Very rarely if you say anything to them do they cooperate and put their dogs on a leash. Most of them have some very bad attitudes and say some really nasty vulgar things to anyone who would dare say anything to them about the fact that their dog is loose and it is in violation of the law.
Photo by Ashley Tubbs.
Missing finger thanks to Mr. Turtle …
Yeah, you don’t want to mess with these guys. I once was stopped alongside the trail looking at a very large snapping turtle … the largest I had ever seen. He was hissing at me. I would not harm him, but I did pick up a very small diameter tree branch (a twig) and just lightly tapped him on his shell. Much to my surprise he jumped at me and scared me half to death. I couldn’t believe they could do what he did. I learned something that day. Another cyclist came along and saw me there. I asked him if he had ever seen a “snapper” as big as this guy. He said no and stopped, dismounted parking his bike and came over nearby. We talked for a bit and then I told him “watch this”. I took the twig and tapped it ever so lightly on the turtle’s shell as before. He lurched up at me again just like before putting on quite a show. This time I was expecting it so it didn’t have the same effect on me. I definitely fully respect him as he could do some serious damage to this old man.
I suppose if you live in bear country you could carry a spray can of bear repellent along with you and hope you never have to use it. And it will work on other animals besides bears. Remember that if you attempt to ride away and some of these guys (or gals) decide to give chase they can most likely run faster than you can ride. And some of them are “triggered” to chase you if you try to flee away from them. Just try to be careful out there as we all want to …
KEEP ON TRIKIN’
Yeah, we don’t have any bears around these parts.
What do you mean … look behind me? Get outta here!
I came across this video I decided to share here. It is not a bike trail per se, but I think you will find the video interesting. I personally feel that the person brought this on himself by continuing to try to advance and scare off the moose. I don’t at all agree with the way this went down. I think there is a good chance it could have turned out a lot different and the animal would not have had to be shot.


 or
or