WEIGHTY MATTERS

weighty matters

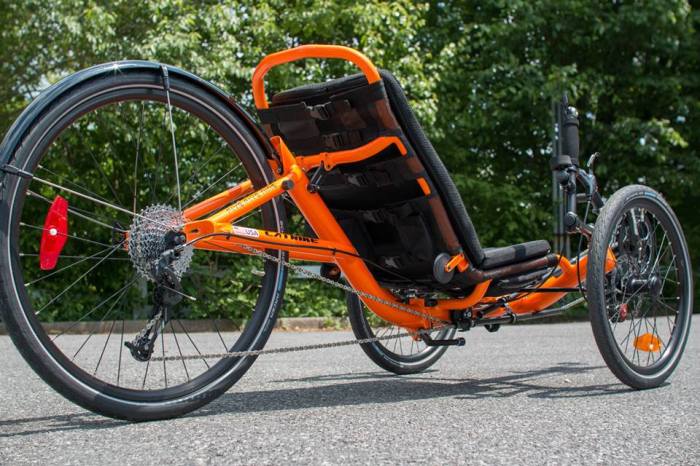
Occasionally I have reason to remove my panniers and trunk bag from the back of my trike. It is only for a short temporary time. And when they are removed I usually lift the trike up and am always amazed at how much lighter it is. It seems like it is an altogether different trike. And I have to admit that it would be nice to ride it with all that extra weight missing. I think my extra stuff I haul around weighs in at about 30 pounds. And that is only what is inside the bags. It is not counting all the other stuff I have added to the trike. My 34 pound trike probably ends up around 70 pounds or more. That is more than double it’s original weight. Oh yes, the Schwalbe Marathon Plus tires are heavier than the Marathon Racers that came on it so that is even more weight. Then there is my fat carcass I am hauling around. Now we are talking about some serious weight. I mean it is a wonder it even moves.

panniers & trunk bag

Pedaling uphill is when it is all really noticeable. Of course, going downhill I readily out accelerate most others. That is the only time that extra weight pays off. Yes, it would be nice if most all of this weight didn’t exist, but with the exception of my  excess body weight the rest of it I would not want to ride without. I don’t care to be unprepared and end up broke down and stranded.

It is all a weighty matter and some argue that weight matters. Some go to extremes to lighten their trike as much as possible. Some of the things they do to achieve this frighten me. I am talking about things like taking half of the spokes out of the wheels, drilling holes in the frame and other parts of the trike, replacing steel bolts with plastic ones even in critical locations which could be disastrous if they broke, etc.

I guess it all comes down to “different strokes for different folks”. I know this … I don’t want to be riding near the person who is dangerously going about reducing the weight of their trike. If they are willing to risk their own life and limb that is one thing, but they could just as easily effect others’ well being. This is all a weighty matter and when it comes to our safety this small amount of weight saved doesn’t matter at all in my book.

But it sure is nice when I pick up the back of my trike when those bags are removed. With or without this weight I speak of, the plan and goal is to …

KEEP ON TRIKIN’

TICK TICK TICK

Tick tick tick … or was it click click click? Hey, I don’t remember. All I know is that near the end of my ride today I started hearing a noise coming from my right front wheel and it seemed to be emitted from my disc brake rotor. I looked it over but didn’t see anything obvious. Upon arriving back home I tore into it. I learned something today which was a costly lesson. I would have and should have spotted the problem much sooner and not only saved myself a lot of work but considerable expense. I say considerable expense because now I need to replace the entire brake caliper assembly. I tore it apart and then discovered that it would not go back together. By the time I did get it back together it was damaged. Now I have no adjustment on the inside brake pad.

Avid BB7 brake pads and spring clip

The noise I was hearing was something making physical contact with the holes in the disc brake rotor as it rotated. Looking back on this that should have been quite sufficient for me to have looked for what would make that noise and the most suspect thing would be the brake pad area. Instead of using my head and taking a close look I just simply observed the condition of the brake pads and laid everything aside looking further elsewhere. DUH! If I would have only taken a close look at the spring clip I would have found the problem. I didn’t see it until I was putting everything back together … the very last thing was the brake pads with this spring clip. As embarrassing as this is to share I am doing so to help others. If you hear such a noise coming from your disc brake rotor as your wheel revolves check out the spring clip in the brake pads. It would have been a simple quick inexpensive repair if I had only done so.

Avid BB7 brake pads with spring clip installed

Yep, that small metal clip somehow got damaged. The one side partially broke off and the rest of it bent back and was what was making contact with the holes in the brake rotor. Tick Tick Tick … all the way home. My brake assembly had been perfectly good. Now I will have to shell out $57 for a new one. I can ride it as is and even have a functioning brake, but it is not right and that bothers me. Besides I have a slight drag on that wheel as the other brake pad has to be adjusted in further to compensate for the side that no longer adjusts.

I have never had this spring clip break or get damaged before so I paid no attention to it. I assumed it was fine. Big mistake. Don’t you make it. Learn from my big goof. We all want to …

KEEP ON TRIKIN’

LUMBAR SUPPORT TO GO

Some trikes come with lumbar support built into the seat while other trikes are simply straight. As a consumer I would be quite willing to pay the extra $10 it would take the manufacturer to put the extra bends in the tubing for the lumbar support. I am sure they would charge a whole lot more than that, but that is about all it would cost them to do it. Utah Trikes offers an add on product to provide lumbar support. It costs about $30 and can be attached to most mesh seats and adjusted to wherever it is needed to provide the comfort and aid to one’s back.

lumbar support

Sometimes it is nice to simply add additional support and some folks need extra help for their backs. Here is this lumbar support added to a TerraTrike that already has built in lumbar support in its seat back.

lumbar support installed on trike

I am not promoting or suggesting the following product shown in this video. I just found it interesting and thought I would share it here.

Looking up this product I found the cost varying between $75 and $100. I have no idea if it is suitable for use on a recumbent seat.

There are other aftermarket lumbar support products available too. TerraTrike offers one for about $35.

TT lumbar cushion

Varilite offers an inflatable one very similar to what I have. The cost is $60.

Varilite lumbar cushion

I have a cushion similar to this which is inflatable so you can adjust the size and effect of it. Mine is orange in color so it stands out … something I would rather it didn’t do. I haven’t used it for years and hadn’t even remembered it until I started writing this article. I don’t have any idea where it is. I would have to hunt for it. Maybe I should and give it a try again.

I am sure there are yet other available to purchase. And I am quite certain that there are those who have/do/will come up with their own.

One thing I want to mention here is that if I were going to add something onto my seat I would not want some sort of a large cushion which would take up precious space forcing my body to sit further forward in the seat. Some trike seats are not very deep to start with so one can’t afford to give up any real estate. ICE seats are quite short … one thing that I don’t like about them.

I am going to go out on the proverbial limb once again and say what I am thinking. It the lowest cost trikes (Sun) come with lumbar support what is the deal that a company like Catrike only offers it on certain models? In earlier years it was only on more expensive models, but now they are all expensive yet they still don’t offer the lumbar support on some models. My Catrike Trail (2009 & 2013) only have a straight seat back. As I stated earlier it would cost so very little extra during the manufacturing process to put the extra bends in the tubing to provide the lumbar support. To my way of thinking not doing so tells me that the manufacturer doesn’t care about the customer. Our backs are not straight so why do they make a seat that is straight?

Riding in comfort is what recumbent tadpole trikes are all about. And adding some sort of lumbar support just might help some of us to …

KEEP ON TRIKIN’

FREE GIFT awaits you!

JUST ADD WATER

trail may be under water

When it comes to recipes adding water is quite common and works well oftentimes. However adding water in not a good ingredient when it comes to certain other things like electricity, picnics, sun bathing, and cycling to name a few. This year has been a terrible year for rain … too much of it (or not hardly any) … in some parts of the United States. That includes the area where I live. We have had record breaking rains and just recently we finally have got some decent weather and things are starting to dry out. However we still only have very limited trails open and available to use. All the flooding, high winds, etc. have devastated much of our trail system and it will take a long time and a lot of work to get them cleaned up and back open.  The rivers have just recently finally dropped down below flood stage so the cleanup effort is just getting started.

These 4 pictures below are not of our area, but they are typical of what our trails look like as far as being flooded over.

trail flooded over compilation

In the video below keep in mind that the trails run right alongside of the rivers so when you see the river which is considerably flooded over in various areas much of the time the trail is underwater.

And here is a video shot from a drone helicopter of the flooding in Foster Park … one of the places I had never witnessed flooding occur before. Most of the park and golf course was under water. There is horrific damage to much of the grounds. I was just out there July 22nd and saw some of the result of the flooding.

This picture below is in one of our local city parks. This is one of the trails which passes thru it. Even after a few days of nice weather the water is still across the trail although not nearly as much as pictured here. I would guess that the water was about 30 inches deep over the trail when this picture was taken.

floodgate in W. Sweeney Park

The city did make an effort to start cleanup work on one of the trails only to get two trucks and a skid loader stuck.  First one got stuck and then the second got stuck trying to pull out the first one. The skid loader got stuck trying to pull out the trucks. Upon getting them out of their predicament they gave up until the mud has dried up more. There is not only ‘gobs of goo’ (river silt mud which is some of the worst mud imaginable), but there are large trees down and plenty of smaller ones as well.

trail closed due to flooding

As an avid trail user it is difficult to deal with. This is the second worse flooding on record for this area. As I previously stated, I have seen areas flooded over that I have never seen flood before. Several city parks and golf course were pretty much destroyed by flooding and will take a lot of work and money to repair/restore them.

With this recent dry spell it is hoped that the rain pattern we have been experiencing this year is over with and things will return to normal. I have posted this picture of a flooded section of trail before but I added another picture alongside of it so you can see what the area looks like when it isn’t flooded. There must be at least 3 or 4 gallons of water there. The area where I have a white X is more than 7 feet of flood water over the trail. The river is off to the left hand side. The farmer’s field on the right becomes a very large lake. Somebody just added water and ruined a good thing.

just add water

Well, all I can say is … try to …

KEEP ON TRIKIN’

Ya’ know … speaking of just adding water … I once came up with what I thought was a great idea which would really make me a wealthy man. I came up with a product I called “instant water”. It was a small tablet which you simply put into a glass and added water then stirred. Much to my disappointment I just never could seem to get anyone interested in it. 😉

MESH SEATS AND YOU

While out riding today I decided to take a couple of minutes to tighten some of my straps on my mesh seat. In doing so I was reminded of the scenes where a guy was helping a gal cinch up a corset by placing his foot in her lower back and pulling for all he was worth. It hurts just thinking about it. This image below is not a mesh seat, but it should illustrate my point as to loose vs. tight lacing.

loose and tight laced 2

I only tightened the upper straps on the back. Anyway, in tightening the straps I noticed a considerable difference when I sat back down in the seat. And honestly, I wasn’t sure I liked the difference it made as it seemed too tight. I kept riding it and eventually I got more used to it, but it still seemed a bit too tight. What I am saying is it really did make a difference and we all have our needs and preferences as to how the seat is set up. I would not be surprised if I end up loosening the straps just a wee bit as I think it would make for a more comfortable ride.

Pulling the straps tight can be challenging and difficult. Our bodies are all different and what feels good and is right for one person may not be  the same for another person … and visa versa. Even mixing up which straps are tightened and which aren’t can be therapeutic. Some people may prefer/need all the straps as tight as they can’t get them while others may prefer/need all of them loose. And some may prefer/need the bottom loose and the back tight or visa versa. Or some other combination may be in order. It is all a matter of personal choice and only we can determine what works for us and what doesn’t.  It may take some experimentation … trial and error to get our seats dialed in to the best comfort for us.

Although the straps on our mesh seats are pretty strong I would caution you that if you are pretty strong it is possible to break them by pulling too hard. I would also caution you that it is possible to have the straps too loose to the extent that they rub something such as the idler pulley for the chain. This is not only inefficient, but in time it can wear the strap in two. Depending upon what type of idler pulley you have it could even stop it from revolving and thereby allowing the chain to wear out the idler pulley. Keep in mind that the heavier the rider is the more chance there is of the seat strap(s) making contact with the chain/idler pulley(s), especially if the seat straps are loose.

Lastly, be aware that the seat straps can and do loosen up. The mesh seat material and straps themselves can and do stretch. This means that it may be necessary to tighten the straps from time to time to maintain the adjustment we want/need. Riding in comfort is the goal and this adjustment is part of it. It will help us to …

KEEP ON TRIKIN’

TAKING A BREAK

It is not uncommon for us humans to take breaks from our various activities. Some people need more breaks than others. When I am out riding my trike I seldom take breaks nor do I feel the need to take a break. There are other activities I do from time to time that require me to take breaks as my body just can’t keep going without shouting out to me for a break. I am usually talking here about physical activities, but I am finding that I also face another area in my life that seems to shout out at me for a break. One of those areas is my involvement with this blog. I find myself somewhat “burned out” and needing a break. Quite honestly I don’t know the future of this blog at this time. I don’t know if I only need a short respite or if I have come to a place where I need to just discontinue adding postings to it. I don’t intend to delete the blog, but this is going to be my last posting for now. I need a break. Besides I am finding it difficult to keep coming up with something to write about. I am just plain fizzled out. Perhaps just a short time will suffice and I will be back at it. However, I don’t know for sure.  If I do restart posting articles I may change the frequency of the postings. I may not have a regular scheduled posting like I do now. I just don’t know. I do want to thank all of the faithful readers of this blog. I am sorry to disappoint you in this, but I really do need a break. Hopefully we can all …

KEEP ON TRIKIN’

update:  for now I have decided not to do the new article posting on a regular basis like I was doing (Mon, Wed and Fri). Instead I am going to post new articles whenever I feel like doing so. I have made a notation accordingly where it used to say posting new articles M,W & F. I think this is what I need at this time. It frees me up and takes the pressure off of trying to come up with new postings so frequently. I will just have to see how things go. Thanks for bearing with me thru this.

LOOKING FOR A USED TRIKE?

Tadpole trikes are ever increasing in popularity as the word gets out about them being so comfortable to ride as well as fun to ride. And safe to ride must be tossed in there as well. They are not inexpensive to purchase however. Many people choose to go the route of buying a used one as they are a less expensive route to go and most of the trikes are in very good condition. I started riding a tadpole trike back in November of 2007. At that time I rarely saw any used tadpole trikes for sale. As the popularity has grown now I see quite a few available. There are several different resources available to check for used trikes. Some owners who are selling their trikes are only wanting a buyer who will come to them to make the purchase while other owners are willing to ship the trike.

A word of caution here for the seller — make sure you have the money in hand and it is good money before allowing the trike to leave your presence. By “good money” I am talking about the fact that even a cashier’s or certified check can’t be trusted these days as they are often counterfeited and used to swindle unsuspecting sellers out of their item(s). The seller assumes that since they were paid with a cashier’s or certified check it is safe and they are guaranteed their money so the allow the item(s) they are selling to be taken away or shipped out only to find out days later that the check they were given is no good. This happens a lot on dealings on Craigslist. It is best to play it safe and wait however long it takes to find out if the check was good or not. Craigslist offers some saftey tips on their website. And there are other similar resources offering advice. HERE is one of them.

I have a page created on this blog for USED TRIKES 4 SALE which lists several resources. I am not going to repeat them here. With the help of the internet many people are listing their trikes online so it is an excellent place to look. Of course, the internet is vast so there are numerous resources online. Some are better than others. Some trikes are priced quite low while others are priced rather high. Some times buyers have got great deals making most of us quite jealous. 🙂

We all have our own financial limitations and capabilities so not everybody can afford the higher quality trikes. We just have to do the best we can.  I will say this … buy the best trike you can afford. Buying certain lower cost trikes isn’t usually a very good idea. Most people who buy “entry level” trikes soon regret it and are not satisfied with what they bought. Even if the trike itself satisfies them as far as its quality the most common disappointment is lack of sufficient gearing. If you buy a trike and then start trying to change it upgrading such things as the gearing it gets expensive in a hurry and the bargain is no longer such an attractive deal. You can invest a lot of additional money into such a trike and in the end you still have an entry level trike which lacks the quality of some of the others they could have been bought initially … and probably for less than the money to do the upgrade.

There is an old adage … “BUYER BEWARE“.  Most people selling their trikes are no doubt pretty honest. However, there are no doubt some who are trying to sell one and not disclosing something significant … like perhaps a damaged frame such as a hairline crack (in or near a weld usually) or a misaligned (bent) frame due to some sort of accident which occurred in the past. It is important that the wheels are in good condition as they are expensive to replace. The same is true of most of the components such as shifters, derailleurs, brakes and the like.

Some sellers are offering trikes with some to many accessories included. Keep in mind that if you have to add these on to the trike you buy you are talking quite a bit of additional money. So if you are fortunate to find a trike that comes with such accessories at a decent price you are ahead of the game.

As with most things common sense and wisdom go hand in hand. You can find a tadpole trike out there. They are available. I wish you well and many fun safe miles on whatever you end up with.

KEEP ON TRIKIN’

FREE GIFT awaits you!

HIGH TECH INVENTIONS FOR CYCLING

We are living in the Last Days prophesied in God’s Word (the Bible) and one of the prophecies tells us of the great increase in knowledge. History proves this out. We are seeing such amazing technology and it just keeps increasing at an incredible rate unlike anytime in previous history. Here are some videos showing some high tech inventions designed for the cycling world.

ADD-E  startup website and an ADD-E article and another ADD-E article

I really like the concept of this next one as it would sure simplify removal and reinstallation of the rear wheel … the HUB DOCK:

THE WEATHER DEPARTMENT, A YEAR TO REMEMBER

The reason for having a tadpole trike is to ride it, but in some parts of the United States it has been and continues to be a difficult year to get much riding in. That’s because of all the rain … day after day … week after week … month after month it seems. It is a year to remember. When is it going to stop? I mean like … give us a break! Even what little time has been available to ride there is so much flooding that there are very few places to ride without encountering flood water … closed trails, closed roads and streets, closed city parks. Then to top it all off there have been some strong winds in some of the storms which have brought numerous trees down which are blocking off trails. Some of the trees are huge. With all the rain the ground is so saturated that the entire root system under them just pulled up out of the ground. Many others were simply snapped off or large branches were snapped off. Many fell onto houses and cars/trucks. I have ridden around various parts of the city and seen many such scenes.

tree uprooted and fallen onto house

tree fallen onto car

They were also blocking streets and sidewalks, but at least those are usually removed fairly quickly. The bike trails haven’t been touched though and probably won’t be for some time. Some are still flooded.

flooded trail in Sweeney Park

In the image below the red line shows about where the bicycle trail runs. There is more than 7 feet depth of flood water over the trail about where I have drawn the yellow line on the red line. The river is to the left beyond the trees.

Maumee Path from North River Road near Landin Road trail marked

This image below is of the St. Joe Pathway near Parnell Ave. As you can see it is completely flooded over. The river is to the left.

flooded St. Joe Pathway near Parnell Ave.

Other trails are a muddy mess and with all the rain aren’t drying up. That means that nothing can be done about clearing the trees off of them. Besides the city is too busy dealing with cleaning up other places which take priority over the trails. That is the story here where I live.

Then there are parts of the nation experiencing bad drought conditions. They desperately need the rain. I sure wish we could send some of ours their way. Not only are they experiencing drought, but they having scorching heat making it miserable and dangerous to be outside. Fires are a serious threat when these conditions exist.

I know that there are those who say “just ride in the rain”. To that I say “no, thanks”. I don’t find that enjoyable at all.

I just took a look at the 14 day extended forecast. Even though it is raining today as it did yesterday the forecast shows several days of no rain. Hallelujah! Thank You Lord. Now if I just had somewhere to ride. I will have to work on that. I want to …

KEEP ON TRIKIN’

HOW TO CLEAN AND LUBRICATE A REAR DERAILLEUR

rear derailleur

Unfortunately it doesn’t work to just ride a trike and never do any preventative maintenance. Sooner or later problems will arise. Components require cleaning and lubrication or they will not perform properly and wear out prematurely. A rear derailleur is a rather amazing device which when everything is set up proper and in good condition will operate flawlessly. It can also give you fits when it isn’t up to snuff. It is important to keep it clean and properly lubricated. Here is a video on how to clean and lubricate the rear derailleur of a bike. In the process, it also demonstrates how to use products from Finish Line Technologies, Inc., including the Brush Set, Speed Clean Speed Degreaser, Teflon Dry Lube, and Extreme Fluoro Grease. The video consists of four parts, how to clean derailleur pulleys, how to brush off a derailleur, how to spray it down and dry it off, and how to apply lube to it.

FREE GIFT awaits you!

BICYCLE AIR PUMPS & TIRE PRESSURE

note: the following is an article from my original tadpole rider blog

Most recumbent tires are high pressure tires … up around 70 to 100 psi. If you don’t have an air compressor at home or in your motor vehicle I strongly recommend purchasing a floor type bicycle air pump … one designed to pump high pressure … preferably 120 to 160 psi. That way when you pump up a 100 psi tire you aren’t maxxing out the pump to accomplish it … or maxxing yourself out using it. 🙂

In fact, I suggest getting one of these pumps even if you do have an air compressor available to use as they are quite handy and practical. I have a couple of air compressors, but I find the floor pump to be a God-send.

Most good quality pumps nowadays have a built in gauge making it very handy. I suggest checking the accuracy of the gauge initially and from time to time to be sure you are getting the right pressure in the tires.

A good quality air floor pump can be purchased at your local bike shop or online. I would also suggest that you talk to a local bike shop mechanic to get their recommendation as to what pump to buy. You could also research them online to get customer feedback.

Here are a couple of examples of pumps available. These are both rather expensive pumps, but one is rated high and the other is rated low.  So you can’t always go by the price or even the name brand. In this particular case the one which costs the most is the one with the bad reviews. One can buy a decent quality air floor pump for as little as $25, but I highly recommend you do your homework first to know what customers have to say about the pump you are considering.


Blackburn Air Tower 3 floor pump

Blackburn Air Tower 3 bike floor pump retails for about $50. It is rated at 160 psi. I found it for $37.50 online.

Park Tools PFP-7 Professional Mechanic floor pump

Park Tools PFP-7 Professional Mechanic floor pump retails for about $62. As expensive as it is this pump is poorly rated. That is surprising since normally ParkTools usually has pretty good quality products. One of the biggest customer complaints about the ParkTool pump is the head.

I am not making any recommendations as to what pump to buy. I am only showing these two as examples of what is available. There are lots of different ones out there.

Pedros Domestique floor pump

I myself have a Pedros Domestique Home Mechanic floor pump I got from a local bike store. It has been a very good pump over the years I have had it. It is rated at 120 psi. Bikebing.com lists it for about $30. And Amazon lists it at about $26 with shipping. The reviews of it are rather poor, but from what I have read the complaint against it has to do with using it on Presta valves. I wouldn’t wish Presta valves on my worst enemy as they say so for me using it on Schrader valves it has been great. I am not trying to proclaim it as a superior quality pump, but for my uses I have no complaints whatsoever.

Most pumps nowadays have a dual head on them so that either Presta or Schrader valves are accommodated. Some of these heads are designed and made better than others.  Those who test these pumps and report on them say that the biggest problem they have found among pumps is the head. As stated … some are better than others. Some work great and without leakage while others are somewhat difficult to use and leak. The ParkTool pump’s head blew off twice during testing.

HERE is an article about floor pumps and their recommendation as to the best pump for the money.

Lezyne Steel Floor Drive Pump

The Lezyne Steel Floor Drive Pump is their choice and it retails for about $60. It is rated at 160 psi. The best price I found on it just now is about $53 (with shipping) online. Interestingly, it has a screw on head rather than a push on and clamp type head. Here is a short quote from the article:

“A good head is one of the few features that separates a great pump from an average pump. The head on the Park Tools PFP-7 has holes for Presta and Schrader valves, reducing confusion and making switching between valves fast and easy.”

Nashbar Earl Grey floor pump

The other pump they recommend as do several other reports is the Nashbar Earl Grey. Actually it was their first choice, but since it is not currently available they have the Lezyne pump as their top choice. The Nashbar retails for about $50. Nashbar reports that it is presently out of stock, but can be ordered and they will ship it when it becomes available. I have seen this pump listed for about $30 so it can be purchased at a great price when available.

Some pumps come with a relatively short warranty while some come with a lifetime warranty. A long hose is a practical feature as is a good solid base so that the pump isn’t wobbly. A large diameter and easy to read gauge is also a welcome feature.

adjustable pointer on guage

I like the type of guage which have an adjustable line or arrow/pointer you can rotate to the pressure you want to pump up to. This makes it easy to see when you have reached that pressure level. The image above shows this adjustable part on top of the gauge quite well. I chose the image for this purpose even though this is not a high pressure pump. As you can see it only goes up to about 75 psi.

In case you didn’t know it, an innertube loses air on a continual basis so it is necessary to inflate them from time to time. That’s right … air leaks right thru the rubber so they are constantly losing pressure. Some seem to leak worse than others and deflate quicker. It is important to keep your tires inflated to the correct pressure. You will get better wear and mileage out of your tires as well as make it easier to pedal along since low air pressure equates to more rolling resistance. Also handling is best when the tires are inflated to maximum pressure.

It is also important that you never over inflate your tires beyond what they are designed for. Doing so can result in destroying the tire and causing a major tire failure which could be disastrous at worst and leave you stranded at best.

I once put about 10 psi more in a knobby tire I used for winter riding. About 10 miles from home I noticed something which wasn’t right as I rode along … a pronounced thump of sorts. I stopped and got off to look. My rear tire was literally coming apart … separating from too much pressure in it. Fortunately I was only about a half of a mile or so from a local bike shop so I made it over there and got a new tire. The tire that had just gone bad would have lasted me for several years more if I had not over inflated it.

Yes, proper tire inflation is quite important … especially if we all want to …

KEEP ON TRIKIN

DRIVE TRAIN MAINTENANCE

colored chain cropped

chains - colored

The chain is often the most neglected and abused part of a human powered cycle and yet it is one of the most important parts as without it “you ain’t goin’ nowhere”. It is important to keep it clean and properly lubricated so that maximum wear, life and dependability will result. Also it will help facilitate proper shifting and pedaling efficiency. Failure to properly maintain the chain will result in premature wear and need of replacement. And that wear and replacement might very well involve the various sprockets as well as a worn chain will wear out the sprockets prematurely.  It can all get quite expensive. Keep in mind that on a tadpole trike the chain is 2.5 to 3 times the length of a typical bicycle chain. So when it comes time to replace the chain it is going to cost 2.5 to 3 times as much as it would if you were replacing the chain on a DF (diamond frame) bicycle. The video below explains the importance of and how to clean a chain. Again, keep in mind this mechanic is talking about a DF bicycle so when he says 119 links you must multiply that by 2.5 to 3 times for a tadpole trike. If I remember correctly my trike requires about 263 links and I am rather short so someone who is tall would probably have on up around 300 or more links. Also when this mechanic speaks of a chain increasing in length by 2 inches on a DF bike on a tadpole trike a worn chain could increase considerably more than that because of all the additional links involved.

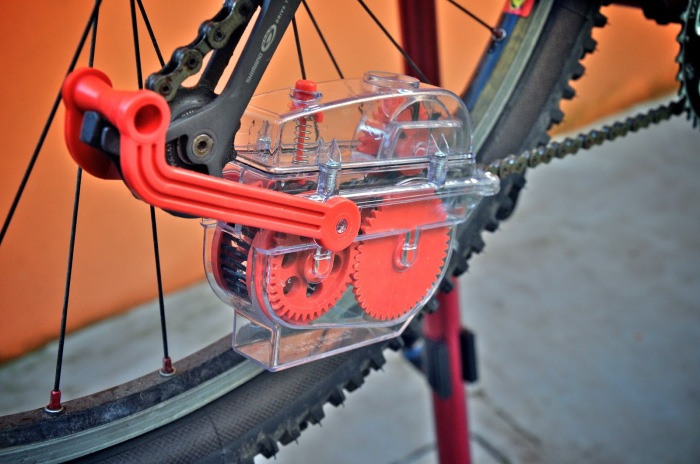
These chain cleaning devices are pretty nifty and make the job of cleaning a chain a lot easier and faster than the way one would go about it without such a device. They also make the job a whole lot less messy. There are several different brands and models on the market. I will state upfront that they are not all created equal. Some are better than others in their design and their quality. Sometimes a cheaper one seems to perform better than a more expensive one, but that isn’t always true so don’t go out looking for the lowest priced one you can find thinking that it will be superior to a much higher priced one. I suggest doing your homework and research into this. Unfortunately I can’t give you any guidance on this as I have only been around two of them. One was a brand name and the other was not. The brand name one cost considerably more, but it didn’t work as well and didn’t hold up as well as the cheaper one. You can pay as much as around $50 for one of these.

Here is a look inside of one of these chain cleaning devices.

chain cleaning machine design

$3.85 chain cleaning machine

Amazon.com sells these “machines” as cheap as $3.85 with free shipping. It it pictured above. It is currently shown as “out of stock”. At that price I would imagine that they sell a lot of them. There is a bunch of different ones available … that’s for sure.

I won’t argue that removal of a chain and the use of perhaps an untrasonic cleaning device is the best way to clean a chain. Even hand brushing might do a better job than using one of these cleaning machines as long as the person doing it does a proper and thorough job. However, certainly the idea of cleaning a chain on the trike is appealing as removing and reinstalling a chain of a tadpole trike is something to be avoided if possible. It can be a real pain of a task to get involved in compared to doing it on a DF bicycle. I have used a couple of these chain cleaners before and thought they did a pretty decent job … enough so that I think I would most definitely prefer using one than doing it manually the “old way”.

Here is another video showing the use of one of these cleaning devices and instructing about how to relubricate a chain after it has been cleaned.

chain cleaning machine being used

One thing about using one of these chain cleaning devices on a tadpole trike is the fact that the pedals are located a far distance from the rear derailleur where this device is normally used as pictured both above and below. This makes it rather difficult for an individual to use the device by him/her self as one can’t normally reach  that far. So if the device could be placed up nearer to the pedals it would make the task easier. However, most trikes have plastic chain tubes up there which would prevent the cleaning device from being placed up there. Another person could be used to accomplish this, but having used a couple of these myself I would have to say that it works best for the person holding the cleaning device to also be turning the pedals as it is important that the person turning the pedals is “in tune” and has “a feel” of what is going on with the chain as it passes thru the cleaning device. If something were to go wrong the 2nd person doing the pedaling might not stop pedaling if and when the need arises and the result could be a bit disastrous. So my advice would be if you are using the service of a second person be sure you are both paying attention and they are prepared to stop pedaling instantly should the need arise. I am probably making more out of this than necessary and unduly alarming folks. Chances are things would go quite well and nothing would be challenging. I just know that things can go wrong and want to make you aware of it.

chain cleaning machine which fastens to rear derailleur

There is at least a couple of model designs which attach to the rear derailleur which might be helpful on a tadpole trike application since it is so difficult to impossible for one person to turn the pedals and reach the rear derailleur area. To use this the trike’s rear wheel would have to be off of the ground.

Pedros ChainPig anatomy

The well known and respected bicycle tool manufacturer, Pedros, makes a chain cleaner they call the ChainPig. It too is a hands free type. It uses a very small amount of degreaser solution. It retails for $28, but can be found cheaper at times. Right now the best price I can find is $22.34 with shipping on Ebay.

HERE is a review article on the ChainPig. They are very impressed with it … more so than any other chain cleaner device they have tried.

When it comes to lubricating the chain there exists some new innovation on the market. Check out this nifty designed lubricant bottle and application device. There are a few companies offering this same designed application bottle. I don’t know how well it works so by featuring it here I am not promoting it.

unique lube bottles

Now that I have written this article I feel strongly convicted. My chain needs to be cleaned. And I don’t currently have a chain cleaning device. I have been putting off getting one. I guess I will have to go do my homework, but right now without doing any more research I have to admit I am drawn to a certain little critter. Here Piggy Piggy!

Properly maintaining and caring for your drive train will help you to …

KEEP ON TRIKIN’

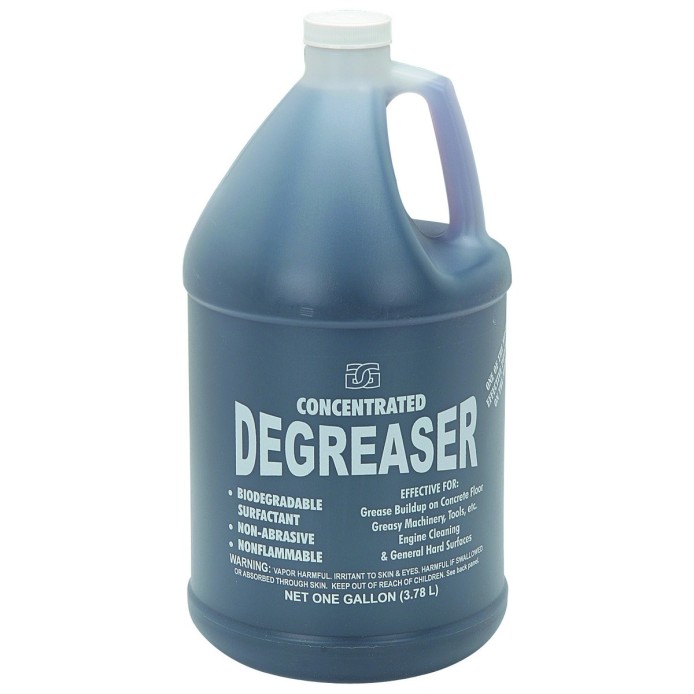
Update: I ordered the Pedros ChainPig the same day I wrote this article. It came in the mail today and I just used it for the first time. I love it. I was extremely impressed. It is so easy to use and did a great job cleaning my chain. It made the chain look like brand new. Yep, it is the cat’s meow! The hands free feature worked great and really makes the difference since I can’t reach the pedals and the chain cleaning device at the same time. It is one little piggy that is going to stay home (vs. going to the market). I loaned it to a friend to try and he also thought it worked really great. He ordered one right away. The only thing I can say is that if you use it (or any other brand/model) while the trike is sitting down on the ground it is hard to do. I definitely advice getting the trike up on some sort of a workstand/table. Since you pedal backwards the rear tire doesn’t need to be elevated into the air. As to degreasers, there are several choices. I use one I bought at Harbor Freight. It is not only inexpensive, but it works great. It is a concentrate intended to be diluted with water, but I use it full strength. It comes in a gallon jug and sells for $6.99.

http://www.harborfreight.com/1-gallon-degreaser-42997.html

degreaser

THE BEE … WILL IT BE?

the Bee

The BEE – a universal urban tricycle. You don’t want to get stung by this one as once it mixes in your blood you just might not be able to shake off its effect. Yep, you would probably just give in and get one. There is only one problem at present … just a minor one, mind you. “The problem is” you ask? It is not yet available. It is currently in a fund raising program trying to get into production. You might say it is a matter of the BEE, or not to be. HERE is an article about this little bug.

And yes, it is also to be available in a motorized version.

There is only one thing I see about it I don’t care for and that is the bicycle type handlebars. They just aren’t comfortable compared to the typical tadpole trike handlebars. One reason I switched to a tadpole trike is to get away from the uncomfortable ride of a bicycle.

Here are the technical specifications:

Length: 210 cm
Width: 100 cm
Height: 145 cm
Weight: 45 kg without motor and accessories
Size of wheels: 406 mm (20″) double wall alloy wheel rims
Suspension: front-combined spring and shock absorbers with central preload spring
Rear-spring URT

Brakes: Sturmey Archer 90mm mechanic drum brakes on the front wheels. Rim brake on the rear wheel.

Speed: Shimano 3×5 speed for hybrid .

Steering: full Ackerman, chopper type handlebars, turning circle: 6 m,

Optional electric motor support: EVbike 250/500W hub set, battery 36V10Ah LiFePO, speed limiter 25 km/h ,

Windscreens: polycarbonate windscreen, roof and side shields

Space: drivers´ height: 1.50 m – 2.00 m, adjustable back support.

Lights: Battery lights on front and rear.

Strong driver cage – weather protection, low side wind sensitivity

Protective shell out self locking U door – easy access, roll over protection
Car high body

Optional electric motor support: EVbike 250/500W hub set, battery 36V10Ah LiFePO, speed limiter 25 km/h


This is one tough little trike …

the Bee 13

For those who don’t understand … that’s a joke. It isn’t really that tough!

I don’t know if this BEE will ever fly and populate planet earth or not. I guess we will just have to wait and see. It is a cute little bug! It would be a shame to not have it survive.